Wednesday, September 25, 2013

Altered antique box....

Hi there...

I have had this box for quite a while... Bright green....not all that pretty. And there was a piece of the rim of the lid that was broken off, so I had to mend it with some wall putty...

There are some amazing details on the side of the box that I didn't want to cover with paper, so I painted the entire box with gesso and dabbed some ivory acrylic paint a couple of places. Mixed a bright green with some black, taupe and yellow.... That was also dabbed around. Added some Graphic 45 papers.

Decorated the lid with some Wild Orchid Crafts roses, Prima roses and a big green rose from my stash. Prima bling. Distressed doilie from Sizzix/Tim Holtz, some cheese cloth and a small alarm clock charm.

This is NOT for sale, I'm so satisfied with it and love it.

Feel free to leave a comment and thanks for visiting...
Hugs


Sunday, September 22, 2013

HAUL of wooden boxes...

Hello there....

Found all these wooden boxes of various designs for DKK 200 approximate USD 30...

As a bonus I found a bunch of vintage keys....

Keep a close eye on my blog and watch the boxes evolve...lol. Let me know if there is any of the boxes you are interested in for me to alter for you and I'll give you a price.. All you have to do is to send an email:-)


Thursday, September 19, 2013

Mixed media - family:-)


Had this wonderful picture of me and my amazing sons from early spring this year. Just a couple of days before my youngest left for a two year mission for our church.

After having made a few mixed media - I took a deep breath and made on for this picture.

Being on a very low scrapping budget, I mix my own glimmer mists. One day I hope to be able to buy Linds's Stamp Gang sprays, but for now I just have to make my own out of my Stampin'Up refills... lucky I have a lot of those..:-)

It actually came out the way I hoped for... just wished the pink would've been more peach:-). But you can't have it all....lol.

Since the canvas is quite small even though it is 12" x 12" / 30 x 30 cm, it is very tiny on my wall above my sofa, where I would like to get rid of the picture that is hanging there. So now I'm making a series of canvases in various sizes... but with some what matching colors...

For now you can see the first one... Your comments are welcome..

Thank you for your visit to my blog...:-)

Hugs

Friday, September 13, 2013

Fall mini album - for sale..

It is soon to be fall, the leaves are beginning to change in color and it is beautiful.

So I pulled out a paper collection I bought actually the first paper pad I got when I just began scrapbooking earlier this year - Bo Bunny "Apple Cider" collection and I also bought some die cuts... Man, does that make embellishing an album so much easier? Loved it.

For the cover I found some very nice paper that corresponded great with the paper collection... I did not have any 12" x 12" papers to use for the cover... Lucky me:-)

It is a five page paper bag album. However, I made the bags myself as it is not all that easy to get paper bags.

Decorated the cover with a homemade flower and some smaller roses from Wild Orchid Crafts. I dyed some seambinding for closure with Stampin'Up's Pumpkin Pie and it turned out beautiful. Added a small charm to the ribbon.

It is so beautiful and I just love the warm colors.

It is for sale. DKK 175,- + shipping. Send me a mail if you are interested.


Cute and simple gift box for both male and female

Saw a tutorial on YouTube by Nicola from the Graphic 45 Design Team.... She was making a secret garden inside the box... Super cute and a must try... But making the box was very easy go to.

So instead of making a secret garden inside the box, I thought it could be fun to try to make a paper bow as a substitute for a ribbon bow.... 

Let me tell you, it is by far NOT the last box I'll make... 

The link to her tutorial: http://www.youtube.com/watch?v=J-FoaX_gLRI

Hope you like it:-)


Halloween pumpkin - cute version

I know, I know.... I am a bit early, but I found this perfect shaped pumpkin at a random grocery store I just passed..... Had to buy it.

Over the years I've carved pumpkins with my boys... FUN - but messy, smelly and after a while ugly and disgusting... This year I'm trying something new..... at least new to me, and I'd love to share the result wi you.

Because I haven't carved the pumpkin, it will last longer.

I've painted the face as you can see and made a funny witch's hat. I was so fun making it.... so I might just make a family...lol

Hope you enjoy.... and give it a go yourself:-)


Sunday, September 8, 2013

Need some help to test...

The follow widget I have under my profile... Would you please try to add yourself and please get back to me if you have any problems doing it.

Thank you so much.

Hugs
Lene

Saturday, September 7, 2013

Canvas 6" x 6" / 15 cm x 15 cm

About two weeks ago I sat and played with a new semi-transparent glitter paint...just love the golden color.

But it needed some embellishment... This is what I came up with... 
Used some scraps of Sunrise Sunset paper, an altered domino and one wood veneer all Prima products.

Besides my big homemade green rose, all the other roses are from Wild Orchid Crafts.
A little cheesecloth and metal embellishments from my stash.

It could be looking for a new home if you should be interested. Send me a mail.


Adorable tiny Christmas card....

Just sat and played with some printouts and some scraps...

a bit cute... right?

Spooky Halloween......Boo

Halloween is coming and I always find myself needing more decorations.

So I got inspired by a friend and wanted to give it a go..... And this is what I came up with.

I took a 12"x12" / 30 cm x30 cm canvas and used the back side. Painted the frame with black acrylic paint. Took a cardboard box and teared it apart and took four pieces and glued onto the canvas back. Painted it over with black mixed with blue and on top of the with a mix of black and green.

Found a picture online of a Haunted House and printed it out on card stock twice. Found a spooky moon and printed that out too. Fussy cut the house and the tree. Then I took four elements from the second print and cut those out to create a 3D effect. Glossy accented the window with light to give it some shiny interest to the house.

Cut out the moon... Just loved that picture... Gave it one spritz with a pearl glimmer mist.

Used Iron rod poles with chains from Tim Holtz chipboard pack and the little white scull peaking out from an other tree I cut out is from there too. 

Found a bat template on Martha Stewart's page and cut out some to place randomly on the frame and canvas.

I really like it.

Thank you so much Archana Josi for the inspiration. Archana has an online craft store with wonderful thing and good deals too. 

Go and check it out on www.craftycity.com

If you want one similar I take custom orders..... This size approx. DKK 225,- + shipping


Friday, September 6, 2013

Altered suitcase


Don’t know how, but my mojo is flowing, and I have to restrain myself not to have more than one project on my desk at the time… my desk is quite small :-)
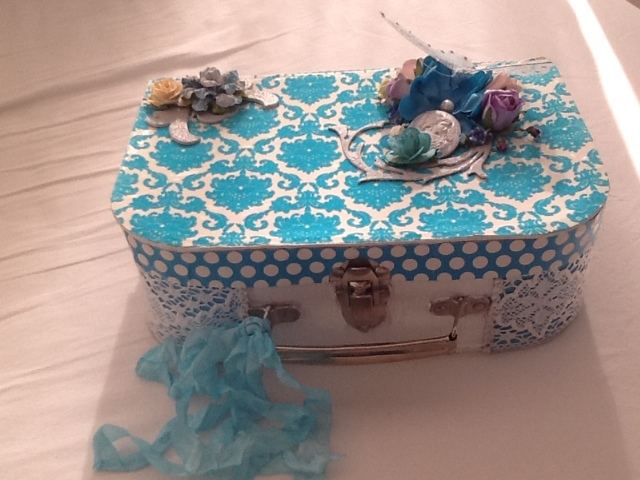
Being at a market day with my sister a month ago I bought this little red children’s cardboard suitcase it was quite beaten up and was used to store a puzzle with huge bricks and one glued on the top.

That lid decoration did not go with what I had in mind, so I pulled it off… and off came three layers of the cardboard, so I began to repair it a bit with pieces of the cardboard using my local decoupage glue. I was saved.
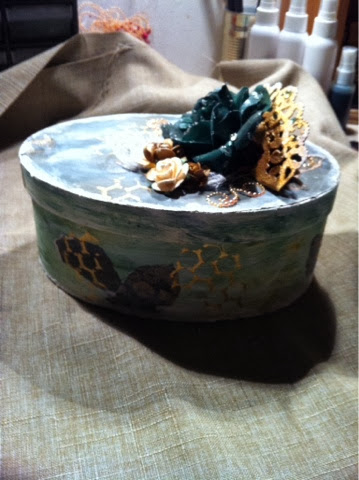
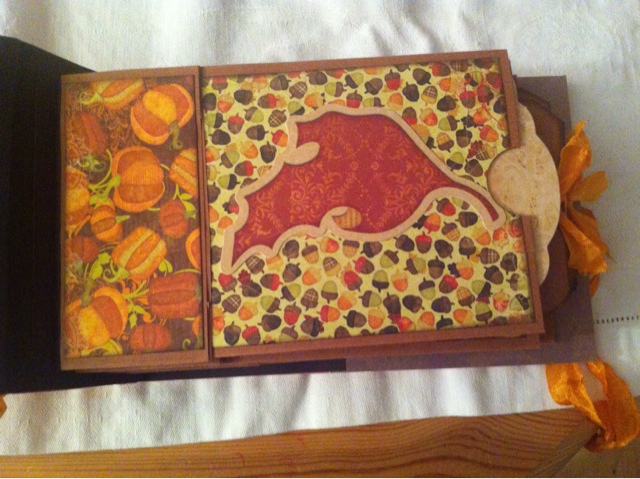
A very sweet and generous friend of mine Kisser had given me some awesome paper with some kind of velvet pattern from My Mind’s Eye “Lush”.
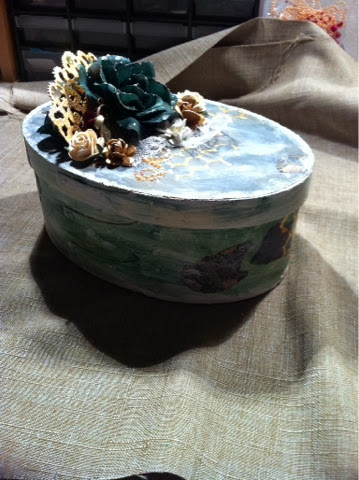
I measured and cut out paper to cover the entire little suitcase. Tried to see if I could remove the closing, but decided that if I did that I would most likely not be able to get back on, it would be too damaged.

When I’m gluing I’m worse than a 3-year old… I get it everywhere…. well, only when I’m using the decoupage glue ;-)

Finally got all the papers to work with me and into place.
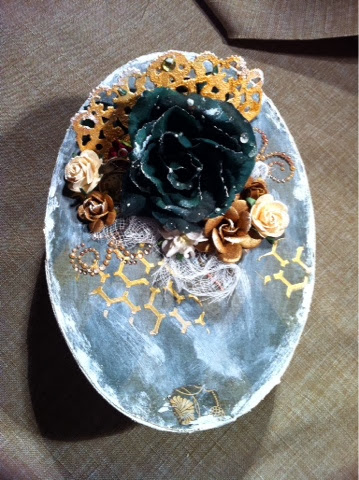
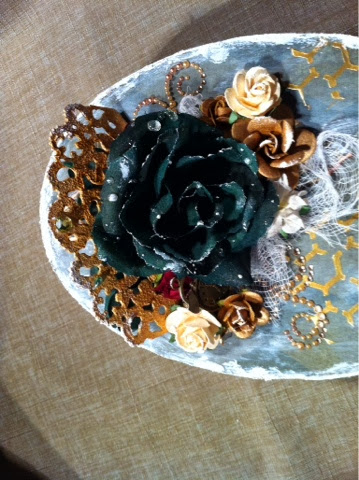
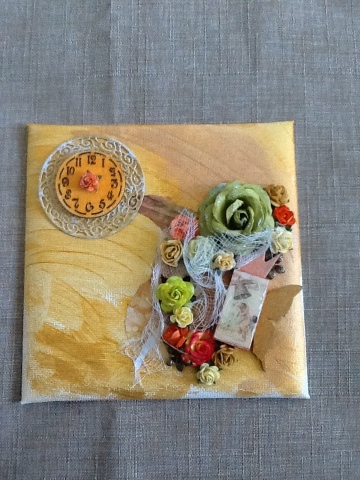
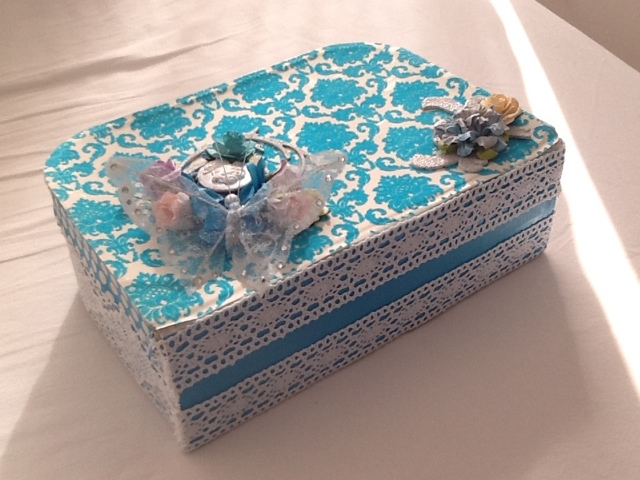
Decorated with some of the lace I sell from my blog here… Made a big flower to center the flower cluster I planned. Found a cute cameo that I bought from Wild Orchid Crafts, where almost all of the other flowers come from.

Added a chipboard corner from Maya’s Road painted it silver and clear embossed it. Under the flowers I adhered a swirl from Tim Holtz, which also tasted my silver covered brush and embossed it too…

Finally I dyed some seam binding I’ve bought from a local online Scrap store ScrapFactory.dk.

Think it came out really cute… now I have to figure out what to put in it..:-) If you’d like to purchase it send me a mailJ

Thanks for stopping by… and feel free to leave a comment.


Monday, September 2, 2013

Positive feedback.... How I love it :-)

Getting positive feedback is amazing. A wonderful acknowledgement of my creations.

Just before the summer holidays I got a custom order for a card for a lady that was turning 60. It had to be in blue colors and with flowers... you can find the picture under "cards" and "custom orders".

Yesterday I was told that she absolutely loved the card! It was right up her alley:-). I am so thankful the that information to lighten up a gloomy day.