I will post other designs... You can order by sending me a mail.
Scrapbooking, stamping, card making, soaping, håndlavet sæbe, sæbesydning, koldrørt sæbe
Saturday, June 29, 2013
Cards - DKK 15,- each
Cute hand made and hand stamped cards.
Laces for sale absolutely good prices - blonder sælges til gode priser.
Hello everyone... I have bought a huge quantity of high quality cotton and polyester laces and I'm selling them at a very reasonable price.
When ordering send me a mail with information of Picture number, lace number (1 being in the top of the picture and two the next and so forth), quantity.
Please note that first come first served.... there is a limited quantity of laces.
Shipping is not included in the prices.
Payment thru Paypal.
Any questions - mail me at Casafrost@gmail.com
Picture 1.
Lace no. 1 - white, 6 cm/ 2,5 inch wide - ½ meter DKK 8,-/ USD 1,50
Lace no. 2 - cream, 7 cm/ 2,75 inch wide - ½ meter DKK 8,-/ USD 1,50
Picture 2
Lace no. 1 - white - 3,5 cm/ 1 3/8 inch wide - 1 meter DKK 8,-/ USD 1,50
Lace no. 2 - cream - 3,5 cm/ 1 3/8 inch wide - 1 meter DKK 8,-/ USD 1,50
Lace no. 3 - cream - 3 cm/ 1 1/8 inch wide - 1 meter DKK 8,-/ USD 1,50
Lade no. 4 - white polyester - 4 cm/ 1½ inch wide - 1 meter DKK 7,-/ USD 1,25
Picture 3
Lace no. 1 - cream - 2 cm/ 3/4 inch wide - 1 meter DKK 7,-/ USD 1,25
Lace no. 2 - cream - 1½ cm/ ½ inch wide - 1 meter DKK 5,-/ USD 0,90
Lace no. 3 - cream - 2 cm/ 3/4 inch wide - 1 meter DKK 5,-/ USD 0,90
Lace no. 4 - white - 2 cm/ 3/4 inch wide - 1 meter DKK 5,-/ USD 0,90
Lace no. 5 - cream - 2 cm/ 3/4 inch wide - 1 meter DKK 5,- / USD 0,90
Picture 4
Lace no. 1 - white cotton feston/eyelet trim - 3 cm/ 1 1/8 inch - 1 meter DKK 7,- / USD 1,25
Lace no. 2 - white cotton feston/eyelet trim - 4 cm/ 1½ inch - 1 meter DKK 8,-/ USD 1,50
Lace no. 3 - white cotton feston/eyelet trim - 5 cm/ 2 inch - 1 meter DKK 8,-/ USD 1,50
Please note that I only have about 40 meters of these trims in all..
Picture 5
Lace no. 1 - black - 2 cm/ 3/4 inch wide - 1 meter DKK 5,-/ USD 0,90
Lace no. 2 - black 1½ cm/ ½ inch wide - 1 meter DKK 5,-/ USD 0,90
Please note that I only have about 30 meter of black in all..
Friday, June 28, 2013
New cards - DKK 20,- each
Beautiful card with an accordion front that closes with a beautiful lace.
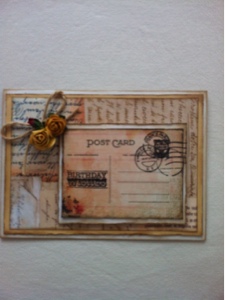
Vintage colored card - "birthday wishes"
Thursday, June 27, 2013
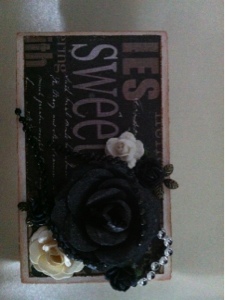
Decorative wooden box - DKK 75,- + shipping
FI've had this box in my stash for a while waiting for inspiration to come:-)
I took it apart.... Those tiny screws...... Painted it with gesso (2 coats), measured and cut the paper.. I used the amazing Engraver paperline from Prima. Distressed the edges of the paper and colored the edges with Vintage Photo from Ranger. Glued the paper on. And distressed the edges of the box with Vintage Photo as well. Assembled it again. Decorated the top with a homemade black rose, a couple of small Mulberry roses, a heart for some bling and a tiny antique brass flower leaf and a black pearl string. Glued some pearls on the bottom.
Hope you like it... I still have a few "raw" boxes left for custom orders :-). Send me a mail with your request for color and I'll get back to you.
Sunday, June 23, 2013
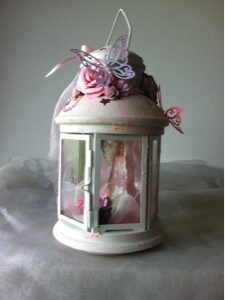
Altered lantern - pink - custom order
I received an order for a pink-ish altered lantern. I enjoyed so much this request... I'm making a video where I'll tell how and what I did....
I really hope my customer will like it.... I think it is cute:-)
TFW:-)
Lene
I really hope my customer will like it.... I think it is cute:-)
TFW:-)
Lene
Saturday, June 22, 2013
Mixed media
This small ( 4 x 6 inch) mixed media was so fun to make:-)
Quite a while ago I painted it with Gesso and adhered some organza tied in knots to the left.... and that was it. I tell you I've been looking at it wondering what to do with it... just until I watched a video on YouTube Mybutterflykiss and MSLiberty25, now I was inspired... However, starting out small....lol.
Next time I'll take pictures along the way and tell you what I do....:-)
Thanks for watching (TFW)
Wednesday, June 19, 2013
Flower tutorial and my first vintage canvas
A new video on YouTube with my vintage canvas along with a flower tutorial.
The flower is super easy to make. With very few items. You don't actually need to run the cardstock thru the Big Shot, you can just leave them plain, and the distress the petals into a darker color.... well, you try it out:-). Have fun and thanks for watching..
The flower is super easy to make. With very few items. You don't actually need to run the cardstock thru the Big Shot, you can just leave them plain, and the distress the petals into a darker color.... well, you try it out:-). Have fun and thanks for watching..
Thank you so much for stopping by....
I am so grateful for the interest to my blog.... And are truly stunned by the many visits from people all over the world.... Not to mention all my Danish visitors.... Thank you all so much!
As I'm just started please make sure to follow me by mail, cause I have so many things I'd love to share with you...:-)
Take care and be creative...
Hugs
Lene
As I'm just started please make sure to follow me by mail, cause I have so many things I'd love to share with you...:-)
Take care and be creative...
Hugs
Lene
Monday, June 17, 2013
Super woman scrapper.....
scrapping 24/7...... I am not :-). I just simply took a dive into my box of half-done projects and pulled out some tags I've been playing with to get a beautiful color effect.
Sprayed 2-3 different color mists on my craft mat and rubbed the tag into it. Leaving it to dry and then stamped some butterfly images on.
I also embossed an image with clear embossing powder and then did the same. Gives an amazing result. The embossed image does not take color.
These three tags are looking for a home - they are ready :-)
These three tags are not quite done missing some ribbon and then they are ready to leave home...
This tag or bookmark is absolutely beautiful in the colors. I used a Stampin'up stamp for the dress on the hanger and a Prima stamp for the roses.
Playing with the color mists or Distress Stains are so much fun.
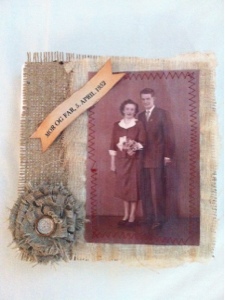
Vintage canvas with picture - a gift
DDdThis canvas is my first attempt and a gift for my sister. The picture is of our mum and dad on their wedding day April 5, 1952.
I really had to hold back on the embellishment. My sister is perhaps a little into vintage, but NOT into shabby vintage which I am:-)
First I made two attempts to transfer the picture onto the canvas, but that did not turn out well. So I sewed the picture onto some cheese cloth. But first I glued some burlap onto the canvas and then glued the stitched photo onto that. Added a homemade fabric flower and a banner that says "Mum and dad, 5 April 1952" in Danish of course:-)
I distressed the edges of the cheese cloth with some Vintage photo and did that to the banner as well.
I'm quite satisfied with the end result and will for sure try this again....
Sunday, June 16, 2013
Purse organizer... or just an organizer :-) SOLD
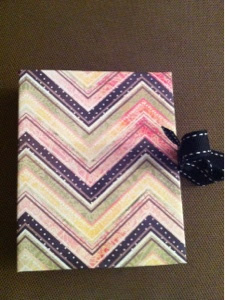
This organizer is in the family with the recipe book I've posted earlier. There is a small note pad that can be replaced. Just love the paper which is from Basic Grey.
As it is meant to be in your purse the only embellishment is the ribbon, don't need anything that can get tangled up with the other things in your purse.
This organizer costs DKK 75 + shipping.
As it is meant to be in your purse the only embellishment is the ribbon, don't need anything that can get tangled up with the other things in your purse.
This organizer costs DKK 75 + shipping.
Saturday, June 15, 2013
Tissue roll alteration...
A very cute decorating item hanging on the wall or even from a which hazel branch.
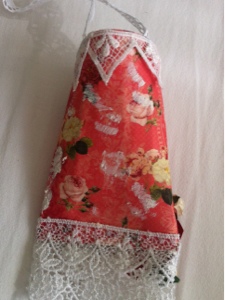
I uses a tissue roll covered it with this beautiful Webster paper. Pressed it flat in one end and glued it.
Decorated it with beautiful lace and roses. The large rose is homemade the small roses are mulberry roses. Then dabbed it with a little white texture paint to give it a little distressed look.
Try it out at home a very easy and fun project to make with kids...... and tissue rolls....? Then just keep coming :-).
Have a wonderful weekend.
Friday, June 14, 2013
How to get rid of glue residue....
Went a little overboard with the glue and was fighting to get it off my desk.....was about to pull out the bottle with refined petrol, even though I just hate useing it... the fumes, yucky residue and the effect it has on my skin.....
Found a recipe for something called Goo-Gone on the Internet ..... Sounded sooooo easy I just had to try it. However, living in Denmark Baking Soda is not on the shelves in grocery stores, so I was thinking of an alternative.....NATRON!
Made a small portion to see if it really worked......:-) Worked great on my desk, but I wanted to put it to the test. Had a used jam jar, tried to get the labels off, but it was impossible....well some came off but not the glue... Used my Goo-Gone and with a little rubbing, rinsing some more Goo, a little more rubbing and the glue was GONE!!!! Amazing....
Goo-Gone recipe:
2 parts of Natron
1 part vegetable oil
Simple right...? It works:-)
Wednesday, June 12, 2013
Recipe book.... SOLD....check out my purse organizer - same idea
This book was made from one of Laura Denison "Follow The Paper Trail"s tutorials. It is an amazing gift idea for recipes or as a bag organizer to save receipts, pictures, gift cards or anything that can fit into the pockets.
I reinforced the corners and panel edges with decoupage glue to make the paper more durable.
You can order one as the picture for DKK 75 + shipping. If specific paper line are requested and with more embellishments it will be a little more expensive. Send your order and color/embellishment choice to casafrost@gmail.com.
Hope you like it... :-)
Beautiful card
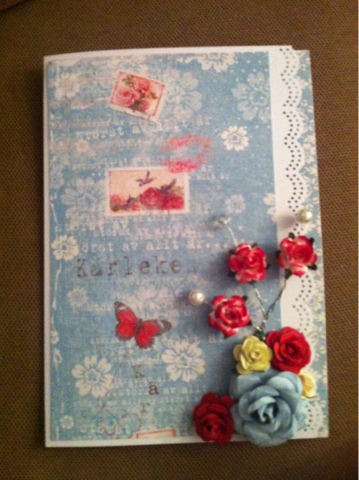
I was asked to create a card for a special occasion and a creative gift. At present I cannot reveal the inside of the card but the outside with a sentiment in Swedish "Greatest of all is love".
Hope you like it and feel free to leave a comment:-)
Monday, June 10, 2013
A new kind of Snowglobe...
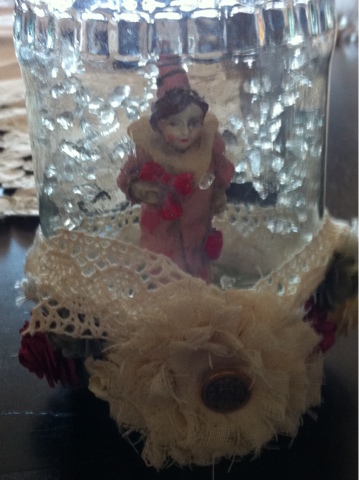
A very cute, no water, snow globe. Adorable for decorating.
Found this tiny clown and thought it would be perfect. Not having any fake snow I used some glass pebbles. After applying decoupage glue on the inside of the jar I put two table spoons of the tiny glass bites in and swirled to make it stick to the sides.
Sunday, June 9, 2013
Envelope for a card, gift certificate or a sweet note - tutorial
Grab an envelope - any size but suitable for your purpose and of course able to fit the Corrugater... Glue the flap.
Cut a piece of the side - my envelope is 21 cm by 15 cm / 7,5 inch by 5,5 inch. The part I cut off was 6 cm or 2 inch. If you choose a different size reduce or increase accordingly.
Choose two or three stamps you want to decorate the large part of the envelope. The below is how I made it, be creative and play with it...
After stamping give the envelope a corrugated look by running the two part in various directions through this device.
Decorate the top with an embellishment of your choice..
Have fun and Happy Stamping :-)
Altered dominos..
Ever since I first saw an altered domino, I looked high and low to find some. Checking out the Danish alternative to Craig's list - DBA - I found some antique and very old, but at a price of DKK 1.500 equal to USD 300, so that was not an option. I had about given up when I saw a box of dominos for DKK 20 (USD 3.50).... Yay, now I could try to alter some myself.
Painted the dominos with Gesso followed by Distress Stains brass and copper. Then to choose what images to decorate with, it had to be tiny pattern and Prima's Fairy Rymes came to mind.... what could be more perfect than tiny faries:-). After I glued the images to the dominos I covered the images with Glossy Accent that gives that wonderful look. The first one - the one in the middle - came out perfect. The two others did cause a problem with bubbles that was very difficult to get out... missed a few... but you don't see it and they are sooooo cute..
Painted the dominos with Gesso followed by Distress Stains brass and copper. Then to choose what images to decorate with, it had to be tiny pattern and Prima's Fairy Rymes came to mind.... what could be more perfect than tiny faries:-). After I glued the images to the dominos I covered the images with Glossy Accent that gives that wonderful look. The first one - the one in the middle - came out perfect. The two others did cause a problem with bubbles that was very difficult to get out... missed a few... but you don't see it and they are sooooo cute..
Friday, June 7, 2013
Still pictures of my entry to the challenge and how I created it..
My reason for participating was to challenge my self in a forum with many and very experienced createurs. To prove that I could do it and with an end result that was beautiful.
I altered a cloths pin. Painted it with Gesso. I then mixed some white acrylic paint with a few drops of Rangers re-inker Tattered Rose which was dapped lightly on the cloths pin.
For decoration I used my absolute favorite paperline A Ladies Diary from Graphic 45. I fussycut an image of a lady with an umbrella.
As the required three laces I used two laces from my stash and a beautiful vintage doily I found at a garage sale.
Other embellishment: Prima wood embellishment (typewriters and clocks), roses from Scrapbookfun, Maya Road and homemade rose.
Thursday, June 6, 2013
A mini album for a friend....
One of my very best friends hosted an open house for my son before he left to serve a two year mission for the mormon church.
I asked what I could give her as a "thank you" for her generosity. An album for her to put pictures of her, her husband and their four kids. It had to be black, white and pink.... I was quite satisfied myself :-).... and luckily she loved it...
I asked what I could give her as a "thank you" for her generosity. An album for her to put pictures of her, her husband and their four kids. It had to be black, white and pink.... I was quite satisfied myself :-).... and luckily she loved it...
Sprogændring - change of language
It seems that I have a lot of visitors from abroad and since Danes are so amazing in speaking and reading English I'm changing the language I use on my blog into English... making my posts understandable to the majority.
Nye projekter på vej...
Sjovt som jeg nu skanner alt (eller næsten) når jeg handler. Ser et potentiale i det meste med det formål at kunne få noget sødt, spændende og anderledes ud af det.
Som det kan ses af tidspunktet af dette indlæg, så er det lidt sent:-). Mine billeder af mine seneste kreationer vil derfor først komme på i løbet af formiddagen i morgen.... Glæder mig vildt til at lægge dem på bloggen....
Som det kan ses af tidspunktet af dette indlæg, så er det lidt sent:-). Mine billeder af mine seneste kreationer vil derfor først komme på i løbet af formiddagen i morgen.... Glæder mig vildt til at lægge dem på bloggen....
Monday, June 3, 2013
En dejlig work-weekend med scrapping...
Det har været en produktiv weekend:-). En del projekter er påbegyndt, men endnu ikke fået det sidste touch.....
Er lidt i vildrede. Har taget en Challenge på YouTube... Scrapjomfru som jeg er, men jeg ville bare super gerne..... Så nogle af de allerede indleverede projekter og blev straks rædselsslagen, for de er vildt flotte.....men stoppede op og sagde til mig selv, at hvis jeg ikke tager en udfordring op, så bliver jeg jo ikke bedre;-).
Synes selv at jeg har udviklet mig meget fra jeg begyndte i Januar, så jeg gik i gang her til aften. Når jeg er færdig, skal jeg lave en video, hvor jeg viser mit deltagerprojekt og så skal det sendes afsted til USA - The Mother land of Scrapbooking....!
Glæder mig....
Sunday, June 2, 2013
Handmade fabric flowers for sale - 3 pcs. DKK 25,- or USD 4.50+shipping - Stofblomster
Pack A - 6-7 cm / 2,5 - 2,75 inch
Saturday, June 1, 2013
Smuk ramme / Altered frame
Subscribe to:
Posts (Atom)


